There are many posts, articles, books, and other resources out there that can teach you how to use the software package R. The goal of this series of posts is more or less to do the same: to give you enough of an understanding of R that you can begin to use it, and even start to learn how to use it on your own.
I am hardly an R expert. The point is that you don’t need to be an expert to use R in very meaningful and useful ways. The goal of this first post is to give a big-picture idea of what R can do, and get you over the first few major stumbles that you are likely to encounter.
It seems obligatory in any R tutorial to first point you to the place where you can download R, which is here:
CRAN stands for the Comprehensive R Archive Network, and you’ll see it come up a lot. For now you simply need to choose your operating system and then download the file appropriate to run programs on that operating system.
Put away your wallet; R is free. That’s kind of one of the big pros.
Now, if you open R for the first time you’re going to be treated to something that looks quite a bit like this:
 I am here to reassure you. You may be intimidated by this, and that is perfectly fine. This may very well be the first time you have encountered a command line interface. That is okay. You may be searching for other things you need to do right now instead of learning R, or deciding whether you want to just maybe worry about this tomorrow. Stick with me; today is the day.
What you are seeing is more or less the core of R. You can type things in the command line, like 3+4, and R will provide you with an answer (hopefully, 7). If you want, this is a reasonable time to type in some calculations, and to see that R is just like your calculator from high school. Play around.
If you’re still feeling anxious about typing into a command line, don’t worry. While you are probably always going to have to type things to use R, there are a number of better ways to go about it. In fact, one of the main things I want to get across in this post is fairly simple:
If you want to instantly be better at using R, use RStudio (or something like it).
RStudio is simply a program that keeps track of all the information that you are feeding in, storing, and pulling out of R. It still uses the core of R we saw above, and that is why you need to install R first in order for RStudio to do anything.
You can download RStudio here:
The good news is that RStudio is also free. You may notice that there is a choice for commercial licensing, but that is only if you work for a company that can’t work with AGPL-3 licenses. The AGPL-3 is one of the same licenses that R uses, so if you are running R then the non-commercial free version of RStudio is no different, at least from a licensing and cost standpoint.
The first time you open RStudio it should look something like this:

You may notice that you still have a command line over on the left (more appropriately identified as the Console by RStudio), but may find some solace in the added Environment/History and Files/Plots/Packages/Help/Viewer windows off to the right. The console works just like R did, and you can type 3+4 the same as you did before.
Again, RStudio is just running an instance of R here. Above and beyond this, though, it is also keeping track of a lot of things that you’d otherwise have to track on your own in other programs. That’s what’s in the windows on the right, but we can make it even better.
Go to ‘File’->’New File’->’R Script’
This will pull up another window in the upper left, pushing down the console to only a quarter of the screen (take that, Console!).

Think of this new script window as a text document, like a Word file. You can type things in here, without the worry of being on the command line. You can run sections of this document, or all of it at once.
Try typing 3+4 again, this time into the script file, then highlight it and hit ‘run’ (or use your operating system specific hotkey, usually some variant of CRTL+Enter). The selected code is taken down to the Console and executed, producing the same answer as before.
Unlike before, we can store a number of lines in our script document and run them all at once, or any number of them at a time. Try typing out some other calculations, each on their own line in the script file. Highlight them all, and then hit run again.
 You can see that each of my calculations were executed in sequence, giving the answers of 7, -1, 0.75, and 12 to the statements of 3+4, 3-4, 3/4, and 3*4.
I should say, you’re not just limited to simple computations. We could type something much more complicated, and R would handle it and give an answer. We will get there.
Now, you might have noticed that the Environment window has stayed empty during the calculations you have run so far (assuming you haven’t jumped ahead ^_^). The reason for this is that we have just been doing one-off computations the same as you might on a physical calculator. Nothing is being stored, so the environment remains empty.
Try typing the following into the script window, then highlight and run it:
x<-3
y<-4
x+y
You should see these lines executed in the console, and you should see some information pop up in the Environment window. The lines x<-3 and y<-4 should have printed and executed in the console, but without producing an answer. That is because they weren’t computations, but rather variable assignments. By giving a variable name, pointing an arrow at it, and then giving some value we want to store in that variable, well, we store that value in that variable.
The final line should have done the same as typing 3+4; that is, it should have returned the answer 7. You also might have noticed that x and y showed up in the Environment window, letting you know that these are persistent assignments that can be used in other computations. Try typing x+10, and you’ll get an answer based on the x that is being stored in this environment. If we hadn’t stored an x you would get an error:
Error: object ‘x’ not found
Now, if using x and y just gave you flashbacks to grade school algebra, take note that there’s nothing crazy going on here (yet), and there’s nothing special about x and/or y. Try typing:
cat<-3
keyboard<-4
cat+keyboard
While you might not expect that cat+keyboard=7, hopefully you can start to see how this makes sense given what we have given R to work with.
We also aren’t limited to only storing things on a one-to-one basis. We can use the combine function to combine a number of values into a set. Try typing:
number<-c(8,6,7,5,3,0,9)
You should see this new variable ‘number’ come up in the Environment window. The [1:7] simply means that the values are stored in this vector in locations 1 through 7. We can use this information, later, to call specific values from such vectors and lists.
Now that we have these values stored in ‘number’ we can do computations to them just as we did to x and y, earlier. Try typing the following:
number+3
Our answer should be the same length as our ‘number’ vector (that is, length 7). When we tell R to take ‘number’ + 3, R (correctly) interprets this as each value of the vector number plus 3. Thus, it performs the calculations:
8+3
6+3
7+3
5+3
3+3
0+3
9+3
Take note, this does not change the values stored in ‘number’ because we haven’t done anything to change them. We’ve simply executed a one-off computation using them.
We can also graphically display the information stored in ‘number’ with a simple histogram, by typing:
hist(number)
Now, try the following:
number+number-number
number*number
number/number
number+number[5]
Think through these commands, and see if you can figure out the calculations behind each of the answers. If you understand what’s going on here you understand a good portion of R.
If you’re feeling particularly good about what you’ve done so far, you can also try typing:
plot(number, number*number)
To some large degree, it’s really as simple as that.
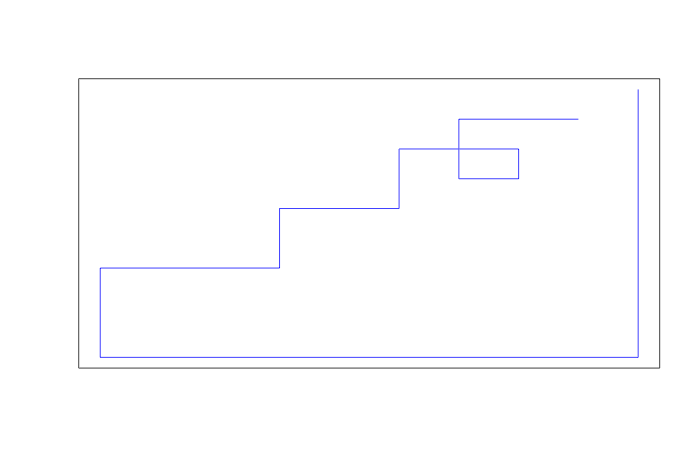
Now, if you want to see something more interesting, try typing:
plot(number,number,type=”steps”,col=”blue”,xaxt=’n’,yaxt=’n’,ann=FALSE)
You don’t need to figure out what’s going on in that plot yet, but you might have fun giving it a try.
Before we finish, I should say that you can save your script files and then come back to them whenever you want. You can have multiple scripts open at once, and have them all working on the same Environment (we can deal with local and global environments much later). You can also save everything that’s going on in the Environment as the workspace of a project, so that your work is easy to come back to right where you left off.
Congrats, you’re using R!